Today in this post we will learn about using or enabling Gzip Compression in WordPress with the top 3 easiest ways. Fast loading speed is the main factor to boost your Ranking on any Search Engine such as Google, YAHOO!, Baidu, etc.
Now Google is promoting sites having fast loading websites with lightweight coding according to the age of 2020 because Google loves its users and you should also care about your visitors because they act a major role in your online business journey.
If your blog or website loads too slowly then it is possible that your users will not visit your website again due to poor user experience on your website.
As you know mostly WordPress bloggers are suffered from this problem, but you can improve your loading speed on every browser by compressing Gzip to load your blog faster than before.
So here are the fully valuable tips improve your website’s performance with 3 easiest methods you should follow…
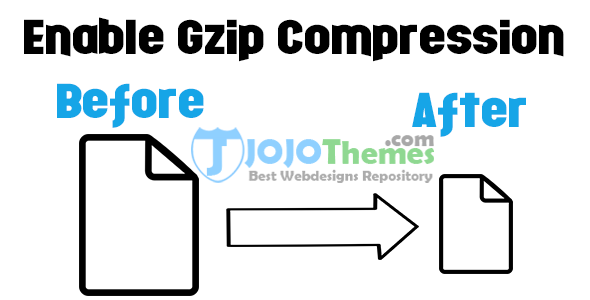
How to enable Gzip Compression for WordPress Website?
In this valuable article, we will study three best methods to Enable Gzip Compression in WordPress using .htaccess file, Plugins, and the last through PHP file named “index.php”. All the procedures are easy to follow as those are mentioned below with proper screenshots. So that you can easily follow them and could do as smoothly…
1. Enable Gzip Compression via .htaccess file in WordPress
This is the most usable way to enable compression in WordPress using htaccess. Because this is an immediately workable method after applying the below code into your .htaccess file using Filezilla or file manager in your cPanel account.
But we suggest you use it with precautions as it is the main file of WordPress, so if you edit it wrongly then it may create some problem in your website/blog. So do your job carefully! Okay now, let start…
Important Note: Please make a backup of your .htaccess file before adding any code to it. For backup this file you can simply copy that file to your local drive.

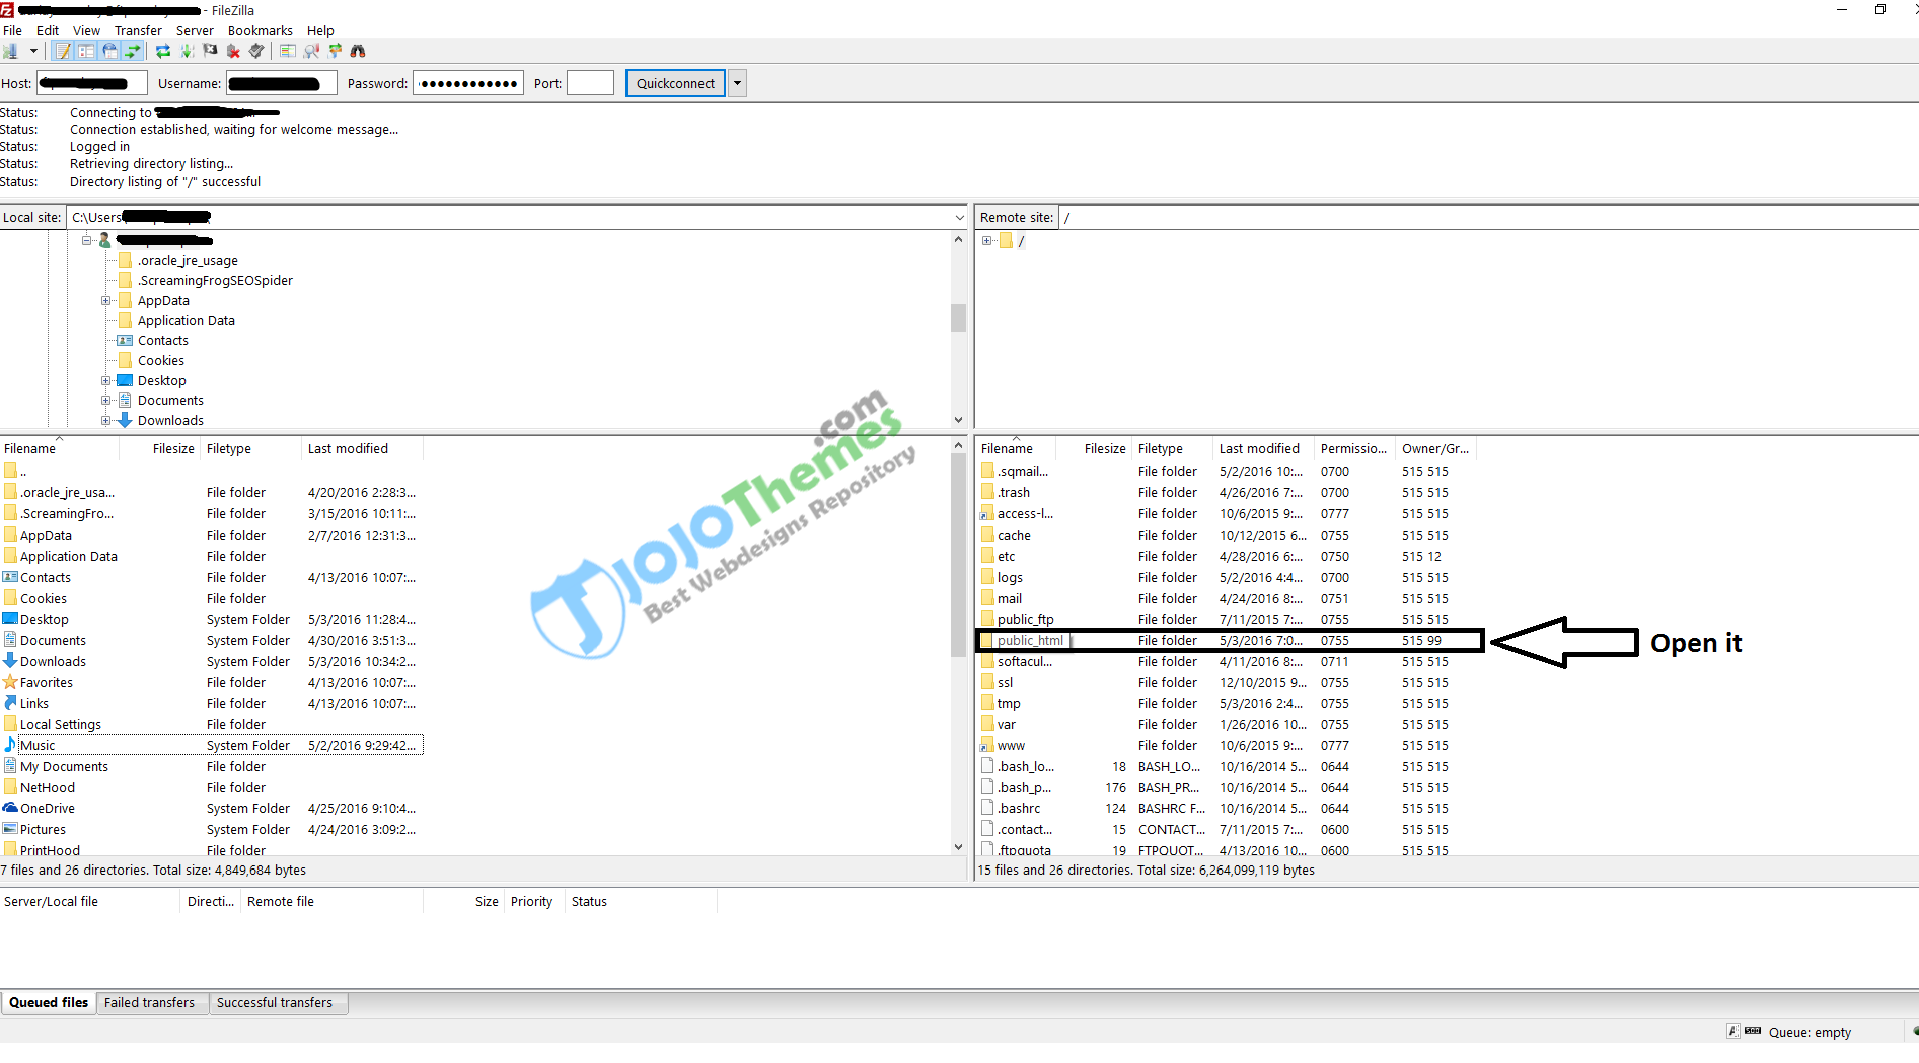
i) Login to your account via FileZilla and for this, you need to have “Host Address“, “Username” and “Password“
ii)Â Open “public_html” folder
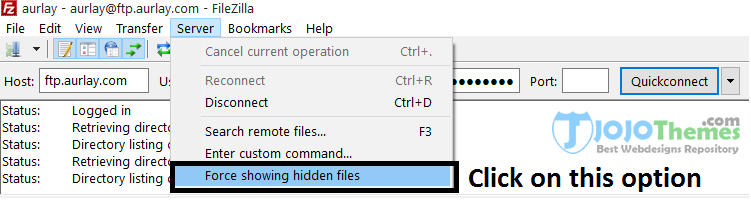
iii) Here you cannot see .htaccess file because this file is hidden by default, you can show it by Filezilla options, Server >> Force showing hidden files and then click on that option to show .htaccess file
iv) Now edit that file and add the below-given code at bottom of the file

<IfModule mod_deflate.c>
# Insert filters
AddOutputFilterByType DEFLATE text/plain
AddOutputFilterByType DEFLATE text/html
AddOutputFilterByType DEFLATE text/xml
AddOutputFilterByType DEFLATE text/css
AddOutputFilterByType DEFLATE application/xml
AddOutputFilterByType DEFLATE application/xhtml+xml
AddOutputFilterByType DEFLATE application/rss+xml
AddOutputFilterByType DEFLATE application/javascript
AddOutputFilterByType DEFLATE application/x-javascript
AddOutputFilterByType DEFLATE application/x-httpd-php
AddOutputFilterByType DEFLATE application/x-httpd-fastphp
AddOutputFilterByType DEFLATE image/svg+xml

# Drop problematic browsers
BrowserMatch ^Mozilla/4 gzip-only-text/html
BrowserMatch ^Mozilla/4\.0[678] no-gzip
BrowserMatch \bMSI[E] !no-gzip !gzip-only-text/html

# Make sure proxies don't deliver the wrong content
Header append Vary User-Agent env=!dont-vary
</IfModule>
v)Â Now hit the “Save” button and you are done.

2. Enable Gzip using Plugins
If the above method is more complex for you then you can use this way in order to an alternative method.
For this, you just have to install one of the below free plugins which are available at WordPress.or repository…
You just have to download it and then install it on your website then activate its settings…
These are the Best WordPress Compression plugin!
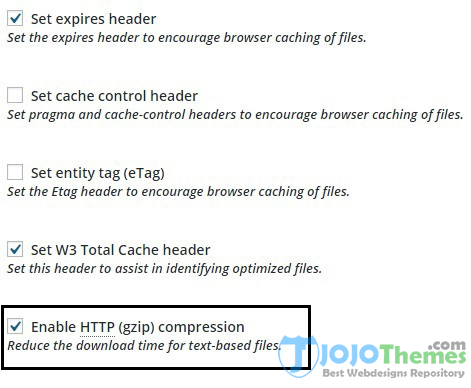
You can also activate Gzip Compression using W3 Total Cache, please see the below screenshot.
3. Enable Gzip Compression through PHP File
This is an alternative way of those mentioned above. for this, you have to edit the “index.php” file and then add the below piece of code at the very first after “<?php” like we have shown you a screenshot…
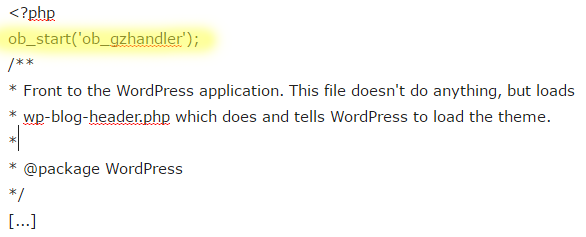
NOTE: For better results, you should edit your main index.php file, not the index.php of your theme(s). Therefore, keep in mind that this required file will be overwritten next time you update WordPress, so you need to modify it again after an update.
Last Step for checking that however it works well or not?
Now after doing any one step of the above three, you should check it that it has been really enabled Gzip Compression on WordPress website or not. For properly checking it you can visit the below websites…
Check and Enable Gzip Compression with the below tools:
- http://checkgzipcompression.com/
- https://varvy.com/tools/gzip/
Final Words:
This is a detailed article on How to Enable Gzip Compression for your website. If you need any help with using any above method then you can ask us freely through commenting. You can also provide another easiest method if you know… Kindly share this article with your friends using Social Media Sharing Networks…